When Cyncly Payments powered by Payments Flex is activated in your database, you can send Payment Links to customers for them to make a payment online. This article will address some specifics on Payment Links with Cyncly Payments.
Setting up the Payments Email Template
With the Email Integration Add on active in your database, you can use a Payments Email Template to populate the amount requested, insert the payment link, and attach the correlating PacSol document to the email. To set up the Payments Email Template, head to your Admin Panel and select Email Templates.
- Click into the Module dropdown on the left-hand side and select Payments (1)
-
In the Body field (2) type the email content you want to use when sending out a Payment Link to a customer. You can choose your own verbiage here.
-
You will need to use the Insert button (3) to add the Payment Link and Amount (4) as a live link, so it populates the respective info each time the template is used.
-
This needs to be done for each user (5)
Sending a Payment Link with the Email Integration
With the Email Integration Add on active in your database, you can use a Payments Email Template populate the amount requested, insert the payment link to use and attach the correlating PacSol document to the email. If you've not already set up the Payments email template, please see the section above for guidance. With the Payments Email Template set up complete, you can head to Customer Payments and follow the instructions below:
- From Customer Payments, select the Account you wish to collect payment for (1)
- Use the green check box to pull over the entire amount on an invoice (2) or
- Enter the specific amount you wish to take payment for on a specific invoice by entering that value in the “Amount Applied” field (3) or
- Add an amount directly in the payment amount field to take a payment that is not applied to a specific invoice (4)
- Click the Payments Flex button (5) to process a payment for the total shown in the Payment Amount Field
- Select Request Payment and click Send Email:
-
This will pull up your Payments Email template:
- You can make any necessary modifications to the email before sending. When the customer makes a payment, those setup for email notifications will be alerted and the payment will appear in the Cyncly Merchant Portal. (See future section for details on Payment Link Email Notifications).
Sending a Payment Link without the Email Integration Add-On
- From Customer Payments, select the Account you wish to collect payment for (1).
- Use the green check box to pull over the entire amount on an invoice (2) or
- enter the specific amount you wish to take payment for on a specific invoice by entering that value in the “Amount Applied” field (3) or
- Add an amount directly in the payment amount field to take a payment that is not applied to a specific invoice (4)
- Click the Payments Flex button (5) to process a payment for the total shown in the Payment Amount Field
- Select Request Payment and click Create Payment Link:
- You can then paste this link into the external email you typically use (ie. Outlook, Gmail)
Setting Up Notifications for Payment Received from Payment Link
In your Cyncly Merchant Portal, located on your Admin Panel, you can adjust Payment Email Notifications.
-
Click into the Merchants Tab and double click into the Merchant ID Line Item.
-
Scroll to the Notifications sections and click EDIT.
-
In the Payment Links field, type an email address and click "Add" or press Enter on your keyboard. When the email has been captured, you can continue adding any additional email addresses needed.
Extending Payment Link Timeline
To edit how long Payment Request links are active, head to the Admin Panel > API Services > Enter
the # of days in the Expire After field:
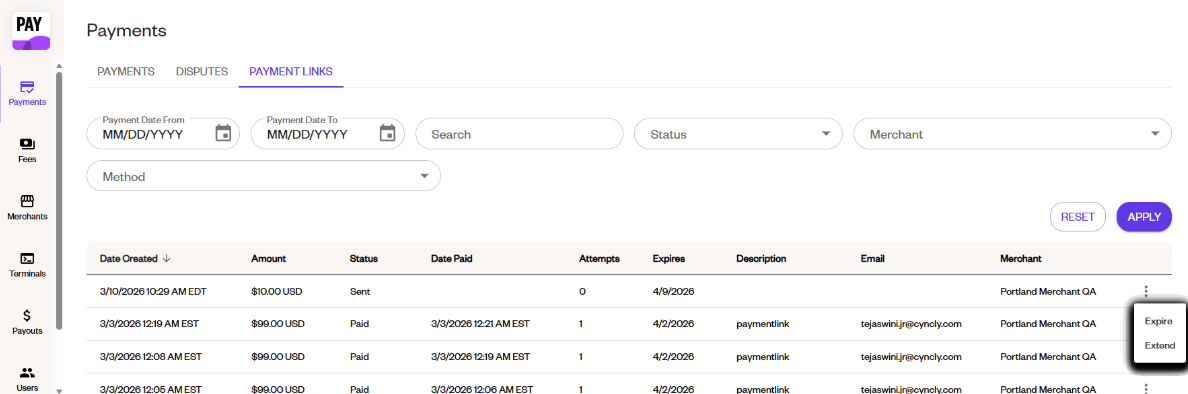
Payment Link Notifications and Extensions