Overview
Closing jobs can take place on a job-by-job basis or en masse through the maintenance area of admin across a found set of qualified jobs. We recommend initially closing on a job-by-job basis for the first 2 few months closings before you attempt to close a large found set. Closing job by job will gain your familiarity with the error messages for incomplete processes that may block the closing. Also, batch closing cannot be undone en masse. Therefore, having experience with the system, and closing jobs individually will provide a base understanding of the process in general and aid you in not committing mistakes that cannot be undone.
Continue with these steps once you feel comfortable with the closing process. You may refer to the paper called “Common Job Closing Errors” to learn about frequent issues blocking the closing process.
Closing Jobs Steps
Step 1. Create a found set of jobs ready to be closed. Do this by filtering jobs by status in the Job Progress Custom report. Navigate to reports, select the Job Costing category (this category could still be “status” reports depending on your version of the system). Select the Job Progress Custom report and enter a date range. Typically, this date range is from the beginning of time (01/01/0001) to the last date entered in the closing jobs time frame. This will capture all not closed jobs up to that point (see figure 1.1).
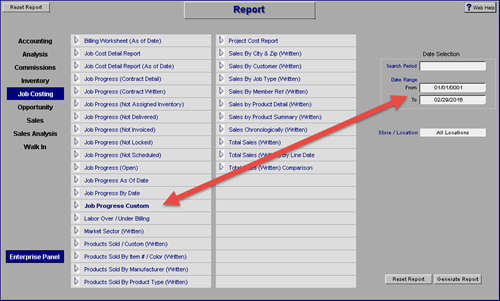 Figure 1.1
Generate the report. The next screen allows you to filter the jobs by the criteria that should be completed before jobs should be closed. For example, you may
select to filter all open jobs where invoicing is completed, cost verification is complete, the commission has been set and the job is paid. This filter group would be:
Closed Status = Open, Invoiced Status =
Complete, Commission Status = Set, Paid Status = Paid, and Verified Status = Verified (see figure 1.2).
Figure 1.2
Click the Locate button to create the found set. Once the report generates, the system creates this as the found set in Sales/Orders. You will click the magnifying glass on one of the jobs to review the number of jobs and verify that it looks about right to you (see figure 1.3).
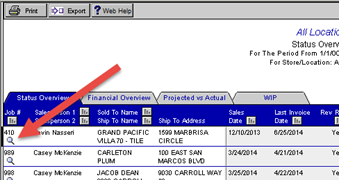
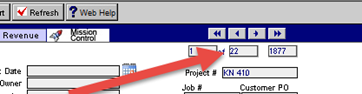 Figure 1.3
Step 2. Navigate directly to the Admin Screen and click the Maintenance button. Inside the Maintenance button select the option to “Close Sales” (see figure 2.1).
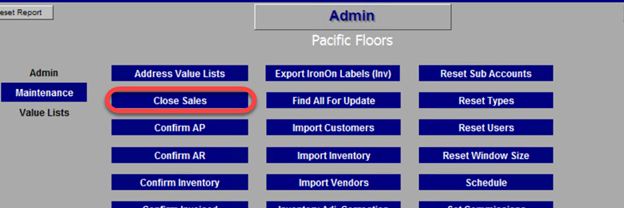
Figure 2.1
Confirm that you want to close all jobs that meet the appropriate criteria.
You will have an option to proceed with the pre-selected set of job records located in the previous step it is important to know you opened the set and are sure found set are the Jobs ready for closure (see figure 2.2).
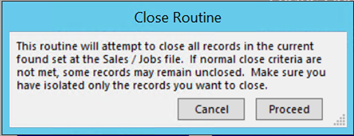 Figure 2.2
Step 3. Once the routine for closing jobs is complete (you will receive a completion message), if all of the jobs did not qualify a message will pop up (See Figure 2.3).
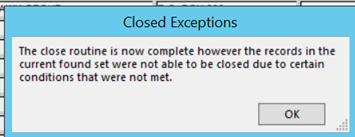 Figure 2.3
Click on the Magnifying glass on the left to open the set, these Jobs will need the issue blocking their closure addressed prior to Closing see “Common Job Closing Errors” to address the issues– At this point closing manually once the item is addressed.
Training-v22-20230401BG-KB